
20 May, 2015
Have been asked a number of times to re-post this. Here you go, enjoy.
March 9, 2014
Optimizing the carrying systems for fighting gear has been a science many have failed to master through the ages. It obviously didn’t start with the invention of the firearm, but one of the primary features of fighting gear for firearms, is the initial load-out, and the fact that you will expend some of the fighting load you carry with each engagement. This is the reason for carrying as much as you possibly can of those fighting expendables, while still remaining light enough to be mobile, and not tiring yourself unnecessarily.
I have used multiple load bearing systems throughout the last 32 years, of that 32 years, 25 were in a professional context, and the items I am about to recommend are based upon my years of training and fighting as a grunt in mounted and dismounted operations. It’s also based on the experience I’ve had as a tactical/survival trainer, and being able to figure out the gear situation, without the Company, Battalion, or Brigade Powers That Be, dictating their dress right dress edicts from on high, but not taking into account that everyone is different, and only a few things should be standardized.
A Layered Approach
Layering makes sense, whether it’s your clothing for cold weather, or your fighting/survival load for the battlefield. The levels have been talk about enough, so we won’t go into detail, but the basics are these. Level 1 is your on person every day carry (EDC) items that are in your pockets for the most part. Level 2 is your fighting/survival load-out, consisting of an load bearing harness of some sort, Level 3 is your ruck. On the level 2 gear, first up is the Battle Belt setup, which, I use as a survival load (Survival gear, handgun, and a knife). Next up is the combat vest, which gives the user a higher more centralized center of gravity, and has the option of being opened in the front, if you happen to be needing to get just a little lower. Examples of this are the FLC like a number of us used in the military in various configurations, and it is a good economical way to go. This is the standard molle tactical vest, pictured here over an H harness rig. (this one is a Tactical Tailor vest), and there is a lot of space to put whatever you need on it, with the caveat of , don’t overload it.


This shows the one change I’ve made in the last seven years (and since the original post). I have added 2, two rifle mag Taco pouches from High Speed Gear. I got ’em from “Rifles Only”, and they were great to deal with.
Last but not least is the chest rig. Chest rigs are wonderful for vehicle patrols, but not as much so if your trying to dig in to avoid incoming rounds in the prone. I used a modified chest rig in Iraq, and can tell you it works well for vehicle ops, but unless you go with a modified version (not as common), using it on foot patrol based field operation are not optimal because of the aforementioned avoidance of incoming fire issues. The modified version I used was a Tactical Tailor MAV 2 piece version with the cover adapter to make it function as a one piece. This modification allows the user to put it on like a tac vest, not over your head ( pain in the ass if you have a helmet on), and also allows you to put you navel in the dirt if your being shot at, and the only available cover is a downed 10 inch diameter tree.


As you can see, it’s easy to take off, which as anyone knows with a one piece chest rig, that isn’t generally the case, unless you undo an emergency release buckle. You can raise or lower the harness to suite your preferences.
The modular system I use for dismounted operations is as follows I use a LCE H harness and belt (with pad) with basic survival supplies in it as the base layer. This harness contains survival gear in the buttpack (poncho, rain suit, casualty blanket, fist aid supplies, weather dependent warmth supplies, battery charger, etc.). It has a pistol in a Bianchi flap holster (yes a damn flap holster, but before you tacticool asshats get your thong knotted, I can slide the flap on the inside of the belt, and I have a thumb break release) with two extra magazines, a fixed blade knife (leatherman, and nav gear is on the pants belt or in pockets), two one quart canteens with two cups, one stove, and a thermal imager (day or night capability).

Over this I wear a Molle Tac Vest that contains a rifle mag capacity of 8/M1A, 8/AKM, or 12/AR, with supplementary stripper clips in the bottom of each pouch when the shorter AR, or M14 mags are used. It also contains a IR strobe, GI Lensatic compass, tac light, extra multi tool (what can I say, I like redundancy), two pistol mags, and a monocular, another fixed blade knife, an IFAK/BOK (different color so it stands out), radio pouch, and an admin/water bottle pouch (water bottle if the vest is worn for urban/vehicle ops). A minimag AA LED light (cuz 123 batts fail quickly) Last but not least is a roll up dump pouch behind the admin/bottle pouch (keep in mind, I’m a lefty, so it’s ass backwards from you “normal” people)

If I will be conducting vehicle operations, I use a pistol belt with a drop leg (OH GOD NO!) holster and knife rig (both up high) on my strong side It also has two pistol mags, my thermal would go on the weak side like the H harness, a roll up dump pouch, and a tac light pouch (pretty damn Spartan ain’t it?). This is attached to my pants belt with standard belt keepers.

One of the nice tings about a drop rig, is its ability to clear the bottom of a coat while being attached to the pants belt.


When it comes to body armor, if I use it (urban or fixed position defensive ops, and vehicle ops only) , I go with a slick Interceptor Body Armor (IBA) vest, with level 3 plates. With this set up, I can wear it under the tac vest, or MAV (as I did in Iraq), and there is nothing to get in the way.
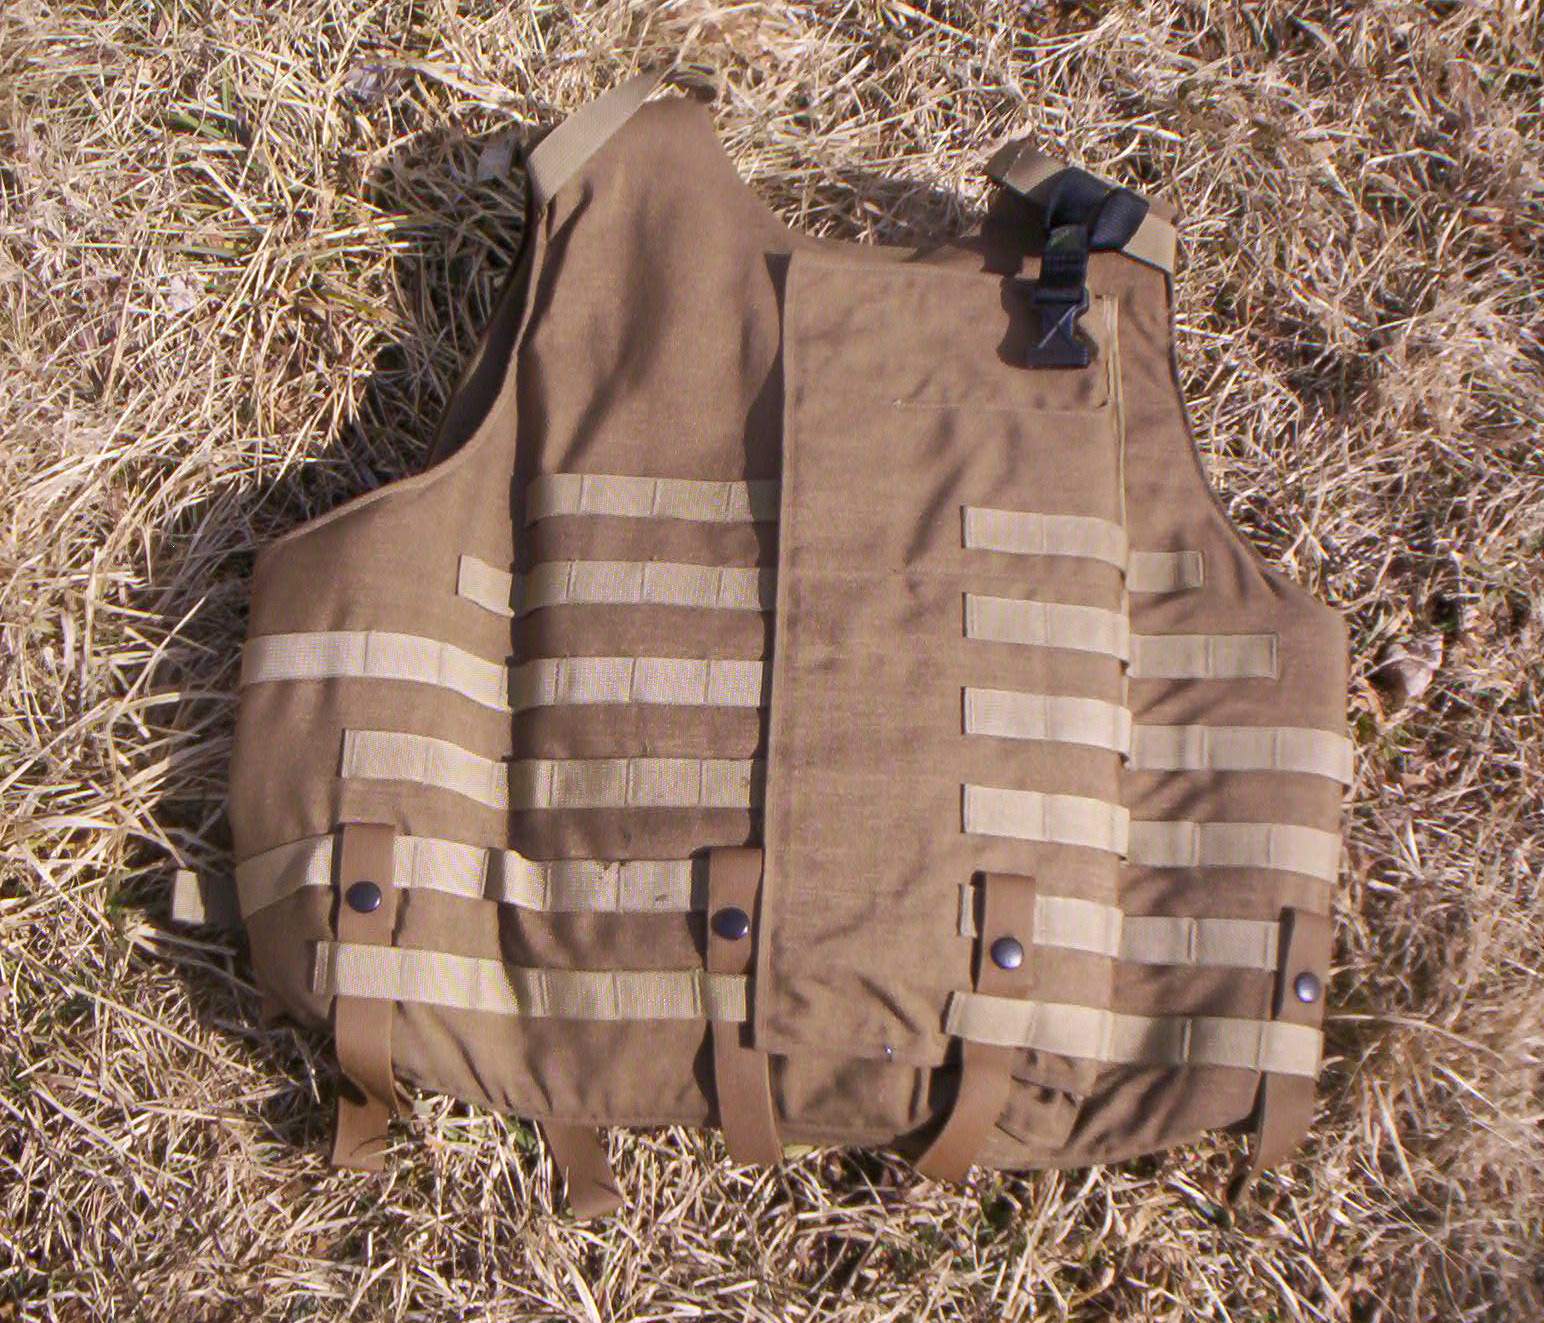

Plate Carrier with steel plates. This is the one next to the bed that is a “grab and go” rig. Grab this and My AR and I’m ready to go. NOTE: You’ll notice the rifle pouches are laid out exactly like the Tactical Tailor Assault vest above for muscle memory purposes.
So how does it all go together: Level 2A is as follows
H harness first with your survival supplies (buckle extender is for cold weather clothing), or the pistol belt/drop leg rig for vehicle ops


Level 2B would be your Tac vest, with the majority of your fighting supplies (keep the back clear), which if need be, you can ditch to run, and still have survival supplies on you (H harness)


Make sure you wear your belt load lower around your hips so it doesn’t interfere with the frame of your ruck (I use a Tac Tailor Malice 2 but that’s for another article) As far as weight goes. At its heaviest, in winter, with a 15 lb 7.62 nato rifle, eight extra mags, 80 rnds on strippers, and a 50 rnd drum my 2A/B gear weighs 70 lbs., and it’s a little lighter with an AKM, or an AR, since I just run that much more ammo with the lighter rifles. Yes it’s a lot of weight, no, I’m not sprinting with it on, but it’s what I train with, and I can always go lighter if I need more mobility. If you train worse case, everything else is easier, right?
Please keep something in mind, This is my way of doing it. I’ve been using load bearing gear for a little while now, and have found something that works for me, and have been using this system for six (seven) years now. These are just some thoughts I had on load bearing equipment (With a new change), from a users perspective, not a Modern Warfare 3 tacticool theorist. Enjoy (any questions, comment here, or email me at masondixontactical@Comcast.net )
JCD
American by BIRTH, Infidel by CHOICE

Pingback: Realistic Redundancy Prioritization And Selection | Prepper's Survival Homestead